

Interior decor focuses on various aspects and areas of the house. However, for most people, interior decor means focusing on the accent colors of a room, color coordination of the items in a room, etc. One aspect that people often forget when working on the interior decor of their house is the flooring.
The floor of your house can easily influence and improve the aesthetic appeal of your house. It is therefore important to ensure that you install the right flooring for your house. Homeowners have numerous flooring options to choose from when installing their house floor.
One flooring option that has gained popularity due to its aesthetic appeal, durability, and functionality is LVT flooring. LVT (Luxury Vinyl Tile) flooring mimics the look of natural materials, for example, stone or wood. Regardless of how similar LVT flooring can resemble natural materials, it is made of several layers of material that are flexible and thin enough to cut through with a knife.
While LVT flooring is reliable, the tiles can get damaged over time. When the tiles are damaged, one should repair and replace them to get the aesthetic appeal of the room back. This article explains how to repair and replace damaged tiles in LVT flooring.

Image Source: Unsplash
1. Determine the Extent of the Damage
When it gets to a point where your LVT floor has a lot of damage that requires repairs or replacing, you should first inspect the damage. When inspecting the damage on the LVT floor tiles, the main motive is to find the extent of the damage and plan the repair process.
When assessing the extent of damage, check the minute details. When the damage on the LVT tiles consists of minute scratches and dents, you can carry out the repairs without replacements. The minute scratches and dents can be fixed using a touch-up kit. The touch-up kits often include a repair spray to remove the fine scratches, a repair pen to fix deep scratches, and a few pieces of safety equipment for handling the repair spray.
When you come across cracked or broken tiles, they require replacement. Count the number of broken and cracked tiles so you can buy the required number for replacements. When buying replacement tiles, you should buy extra tiles in case of any breakages during transportation or installation.
2. Removing Broken or Cracked LVT Tiles
When repairing or replacing damaged LVT floor tiles, the first step is to remove the tiles. Be aware of whether the tiles are using glue, or whether the tiles are designed to click together and hold themselves down.
When removing tiles installed using glue, the force required to remove the tiles is more. When removing a tile, pick up your utility knife. Having a utility knife is paramount when removing LVT flooring tiles. The utility knife is used to lift the cracked or broken tile without ruining the tiles in the surrounding area.
Once you have created a slight gap between the ruined LVT tile and the other tiles, lift it gently. Once there is enough space to fit your finger under it, switch the utility knife for a flat-head screwdriver. You can also use a chisel to continue prying up the damaged tile gently. When removing the damaged tile, you should not rip it off using your hands. Doing this will ruin the underlying floor structure, causing more problems.
Once the tile is removed you can advance to the next step in the repair or replacement process.
3. Cleaning the Area Underneath
Once you have removed the damaged LVT flooring, clean the area underneath it. This can be done using a hoarse scrubber or other tools to remove all debris and grout that was under the tile.
Removing debris and grout that was under the removed tile is vital to ensure that your new LVT flooring tile remains well aligned. The cleaning should be thorough to ensure no debris is left behind.
When cleaning, avoid using harsh chemicals or compounds that can discolor or ruin the surrounding tiles. This is why it is recommended to use a brush and common cleaning products.
4. Tile Trimming
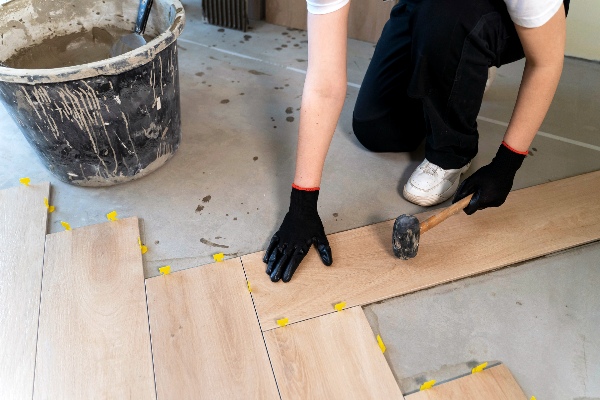
Image Source: Freepik
New LVT vinyl floor tiles come in different sizes. Oftentimes, when LVT flooring tiles are installed on a floor for the first time, they are trimmed to ensure there is a perfect fit. Due to this, it is common to find that the replacement flooring tiles cannot fit perfectly without trimming them.
Once you have removed the ruined flooring tile and cleaned the underlying area, measure the dimensions of the space. At this point, you must have professional measuring tools because you cannot wing it at this step. Accuracy is quite vital.
An improperly trimmed tile will not fit well into the gap created when the wrecked tile has been removed. This step is where the tile replacement process will start being quite hard, especially if you have not done it before.
5, Replacement Tile Installation
Once you have perfectly trimmed the tile, you can now install it. As explained earlier, there are two types of installation methods used for LVT flooring tile installation. The most common is the use of glue. The other method used to install the tile is the fit-and-click method.
For the glue method, you should evenly apply glue to the backside of the replacement tile. This can be done using a paint roller, either small or large size, depending on the size of the replacement tile.
Once you have applied the glue, place the replacement tile into the space. When placing the replacement tile, ensure that it sits well with the surrounding tiles and that there are no spaces between the tiles. Once this is done, you can use a dry roller to press the tile firmly down into the space.
When using the fit-and-click installation method, the work involved is not as much. Just lay down the replacement tile into the space and use a roller to click it in place with the surrounding tiles.
Apart from timely repair and reinstallation to maintain your LVT flooring, you should also implement measures to prevent future damage. One of the best ways to do this is to protect your LVT flooring from scratches and scuffs by placing floor protectors on the legs of furniture and using door mats at entrances.
It is important to take steps to prevent future damage by protecting your flooring from scratches and cleaning it regularly. If you are unsure about your ability to replace a tile, it may be best to call in a professional.
Feature photo by Jason Hafso.